In this blog post, we will explain how to make your blog discoverable in the Fediverse as an account, and also address some of the annoying pitfalls I encountered. So let's get started.
You can also navigate the other parts of this series here.
Overview
To enable discovery, we need to implement the webfinger endpoint and the actor file.
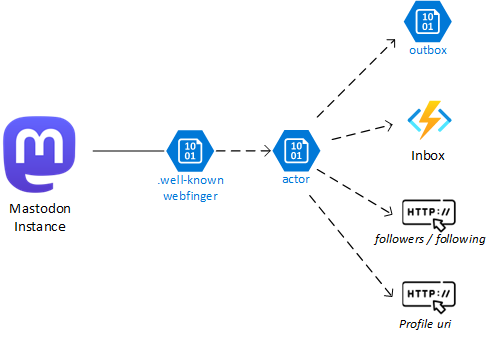
As shown in the diagram, Mastodon will first reach the webfinger, which points to the actor file. The actor file, in turn, points to other endpoints such as outbox, inbox, followers, and following. I have included this diagram so you can refer back to it for visual cues while reading this post.
Creating the Webfinger File
When you type an account name in Mastodon (e.g., @blog@maho.dev), it splits the account into two parts: @username and @domain (e.g., @blog and @maho.dev). The first thing Mastodon does is go to that domain and ask for what accounts exist there. This is done through the file .well-known/webfinger, which should look like this:
{
    "subject": "acct:blog@maho.dev",
    "aliases": [
      "https://maho.dev/@blog"
    ],
    "links": [
      {
        "rel": "self",
        "type": "application/activity+json",
        "href": "https://maho.dev/@blog"
      }
    ]
}
There are a couple of things to notice here. The subject has its own format, which is part of the ActivityPub implementation. Then you have a list of aliases, and I strongly suggest keeping just one for simplicity. Then you have a set of links; these are very important. Mastodon will look at those links and, depending on the need, will use the right type.
This was enough for Mastodon and the Fediverse to find my blog. However, there was an issue: whenever someone clicked on my profile, a non-human-readable JSON was shown. For internal calls, Mastodon will look for the application/activity+json, but for humans, we will add a new link of the text/html type. It would look like this:
{
    "subject": "acct:blog@maho.dev",
    "aliases": [
      "https://maho.dev/@blog"
    ],
    "links": [
      {
        "rel": "self",
        "type": "application/activity+json",
        "href": "https://maho.dev/@blog"
      },
      {
        "rel":"http://webfinger.net/rel/profile-page",
        "type":"text/html",
        "href":"https://maho.dev/"
      }
    ]
}
It is important to notice that the .well-known/webfinger endpoint can take and receive query parameters to look for a specific account. This is the single point used for discovery, but in our case, we are ok with just one account.
Creating the Actor File
The second step is to create the actor JSON descriptor file. This should reside in the same location as the self-link (e.g., https://maho.dev/@blog). It is not required to have the @ character. This will look like this:
{
    "@context": "https://www.w3.org/ns/activitystreams",
    "id": "https://maho.dev/@blog",
    "type": "Person",
    "following": "https://hachyderm.io/users/mapache/following",
    "followers": "https://hachyderm.io/users/mapache/followers",
    "inbox": "https://activitypubdotnet.azurewebsites.net/api/Inbox",
    "outbox": "https://maho.dev/socialweb/outbox",
    "preferredUsername": "blog",
    "name": "Maho Pacheco - Blog",
    "summary": "Bite-sized pieces of Software Engineering from a Garbage Code Connoisseur",
    "url": "https://maho.dev/",
    "discoverable": true,
    "memorial": false,
    "icon": {
      "type": "Image",
      "mediaType": "image/png",
      "url": "https://maho.dev/img/avatar.png"
    },
    "image": {
      "type": "Image",
      "mediaType": "image/png",
      "url": "https://maho.dev/img/avatar.png"
    },
    "publicKey": {
      "@context": "https://w3id.org/security/v1",
      "@type": "Key",
      "id": "https://maho.dev/@blog#main-key",
      "owner": "https://maho.dev/@blog",
      "publicKeyPem": "-----BEGIN PUBLIC KEY-----\nMIIBIjANBgkqhkiG9w0BAQEFAAOCAQ8AMIIBCgKCAQEA68oSTjzLryZ+lLIu8N5+\nCZdQPKaN6xZCY93uzJ8b4wjOecEykQcGU2J+ejOzMXHP4o4N+Rc0xnxyAs9ZN5AX\ndYSObpdfGQvrvdHanu+iTyRKETKMbSHtJzk5dZW8l+pPnX2YWKVgSfCG2SALZprg\nzxyhbtTLq8JoN8b5TgEA1B12Rya3aBNNXDT1/eeU+/HqwtKN2nLAdvACbccPAtg1\nVeKdcSgmS2o51JR4MjJWcCgM2HrAZUepF1XM59Yeq136QGviJpfAFX6gS7POvi7r\n3iaH0GzuUzR+WJSHgoJ65VzC9wy4Vpw/jt8CNtlW13iFRasHARTwFe+1FhuZayPG\neQIDAQAB\n-----END PUBLIC KEY-----"
    },
    "attachment": [
      {
        "type": "PropertyValue",
        "name": "Blog",
        "value": "<a href=\"https://maho.dev\" target=\"_blank\" rel=\"nofollow noopener noreferrer me\" translate=\"no\"><span class=\"invisible\">https://</span><span class=\"\">maho.dev</span><span class=\"invisible\"></span></a>"
      },
      {
        "type": "PropertyValue",
        "name": "LinkedIn",
        "value": "<a href=\"https://www.linkedin.com/in/mahomedalid\" target=\"_blank\" rel=\"nofollow noopener noreferrer me\" translate=\"no\"><span class=\"invisible\">https://www.</span><span class=\"\">linkedin.com/in/mahomedalid</span><span class

=\"invisible\"></span></a>"
      },
      {
        "type": "PropertyValue",
        "name": "GitHub",
        "value": "<a href=\"https://github.com/mahomedalid\" target=\"_blank\" rel=\"nofollow noopener noreferrer me\" translate=\"no\"><span class=\"invisible\">https://</span><span class=\"\">github.com/mahomedalid</span><span class=\"invisible\"></span></a>"
      }
    ]
}
There are many things happening here, so let's dive into them.
Basic Fields
Context.
"@context": "https://www.w3.org/ns/activitystreams". All the ActivityPub JSONs will contain this to specify what type of schema we are using.Type.
"type": "Person". The full list of types can be found here. If the type isApplicationorService, it will be interpreted by Mastodon as a bot flag.Following and Followers. This is the location where Mastodon will look for the objects for following and followers. There is no restriction to say these need to live in the same domain. In my case, to simplify the implementation, I am using the ones from my personal account. That's why it shows like 300 followers when in fact the blog has around 20.
Outbox (
https://maho.dev/socialweb/outbox). This is the location of my outbox, a static file that contains references to all the posts from the blog. We will explain how to generate it in the next posts.Inbox (
https://activitypubdotnet.azurewebsites.net/api/Inbox). This is the location of my inbox. This is the main point of communication with the Fediverse. It is dynamic and will receive POST requests each time someone follows/unfollows the blog, replies, deletes a comment, etc. If your blog is also following other people, it will also receive the posts created in other instances. It does not need to live on the same domain.PreferredUsername, name, summary. Self-descriptive informative fields of the account.
Memorial and Discoverable are not part of ActivityPub but are part of Mastodon. They are used to mark an account as a tombstone and see if it can be discovered.
Icon and Image objects. These are used for the avatar and the picture on the back. In my case, because I am lazy, it is the same one.

Id and Url
I created a special section for these two fields to do a side explanation of how id/urls work in almost all other objects (e.g., like notes).
The HTTP protocol allows specifying some special metadata in each request. Some of that metadata is specified in a special section, named headers, and could contain things like tokens for authentication and other information. One of the special metadata included is Content-Type and Accept. The first one is optional and it is useful to tell the server that receives the HTTP call what type of information we are sending. If it is not sent, most servers will try to guess. The second one will tell the server what format we want on the response. It is very useful for some APIs and web pages to use the same endpoint and receive responses in xml, json, or text/html, depending on what we need.
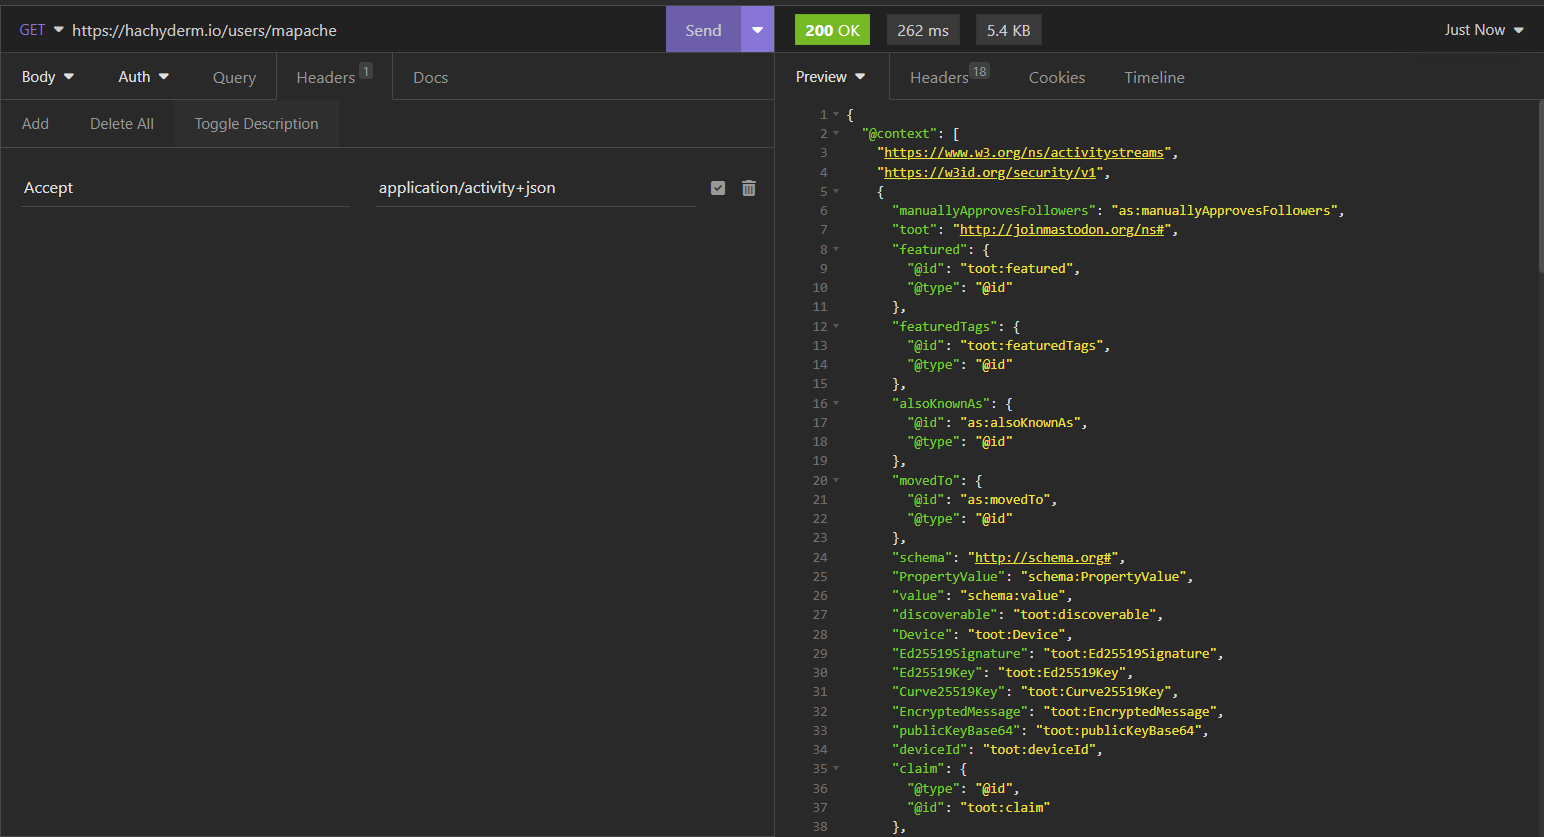
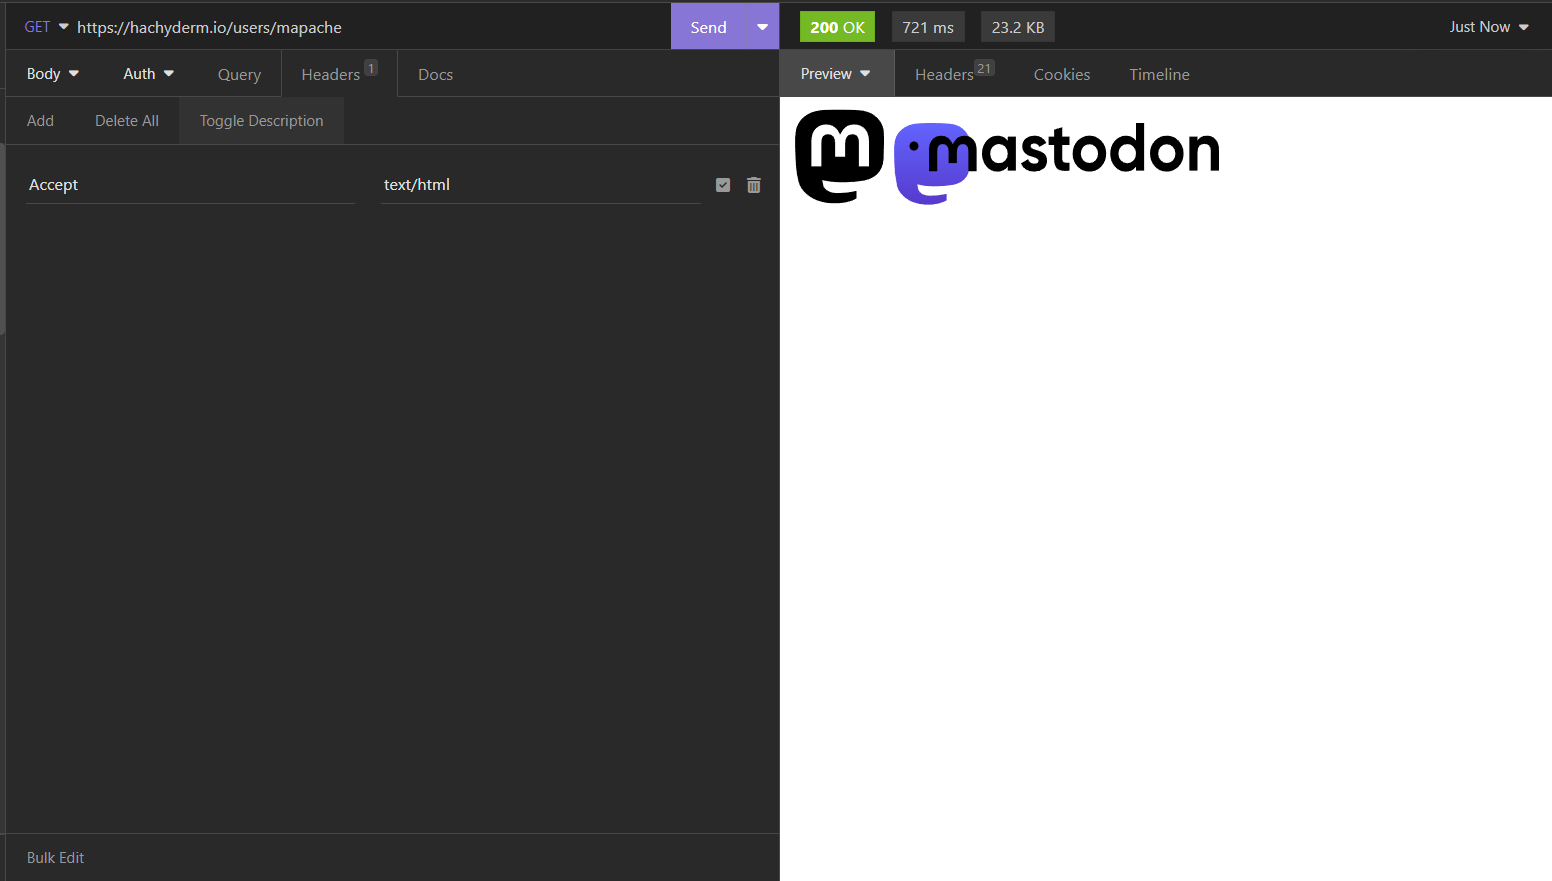
On Mastodon, there are a lot of endpoints that if we send an Accept: application/activity+json, we will receive a JSON as an answer, and if we send an Accept: text/html, it will return a rendered page. One of the examples is the user, where the ID and URL have the same value. These are examples of how it is shown using Insomnia to do the requests:
GET https://hachyderm.io/users/mapache application/activity+json
GET https://hachyderm.io/users/mapache text/html
However, in our static site, we cannot do that. We do not have a fully fleshed server that can do this fancy stuff. Instead, we rely on the Content-Type of the blobs.
This is why it is important that the id URL points to where the actor file is, with the proper application/activity+json, while the url points to a URL where to find the profile. In my case, the homepage of the blog. This is what is used here:

PublicKey
This object is very important since it is used to sign and validate requests to/from Mastodon. You can generate a key pair (private/public) with OpenSSL:
openssl genrsa -out private.pem 2048
openssl rsa -in private.pem -outform PEM -pubout -out public.pem
It is important that private.pem is stored securely because if not, anybody can sign requests in your name. The public.pem file will contain the content of "publicKeyPem". Just replace the end-of-lines for \ns.
The ID is important (e.g., https://maho.dev/@blog#main-key) because it will be the identifier of your key, but it does not need to be reachable by the hashtag.
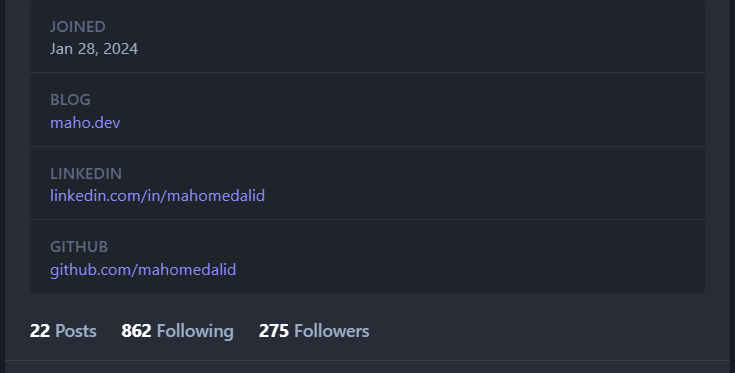
Attachments
These are the links that appear in your profile here:
Uploading the Files
Each static site generator is different, but in my case (Hugo), I just put the files in the folder static, and when I execute hugo, they get copied automatically to public.
Hugo also has a utility to deploy the files to Azure. So the whole thing looks like this:
$ hugo
$ export AZURE_STORAGE_ACCOUNT=<storageaccountname>
$ export AZURE_STORAGE_KEY=<secretkey>
$ hugo deploy
I have this in a script (e.g., hugo_deploy.sh). There is one more step, and your blog will be able to be discovered.
Setting the Content-Type
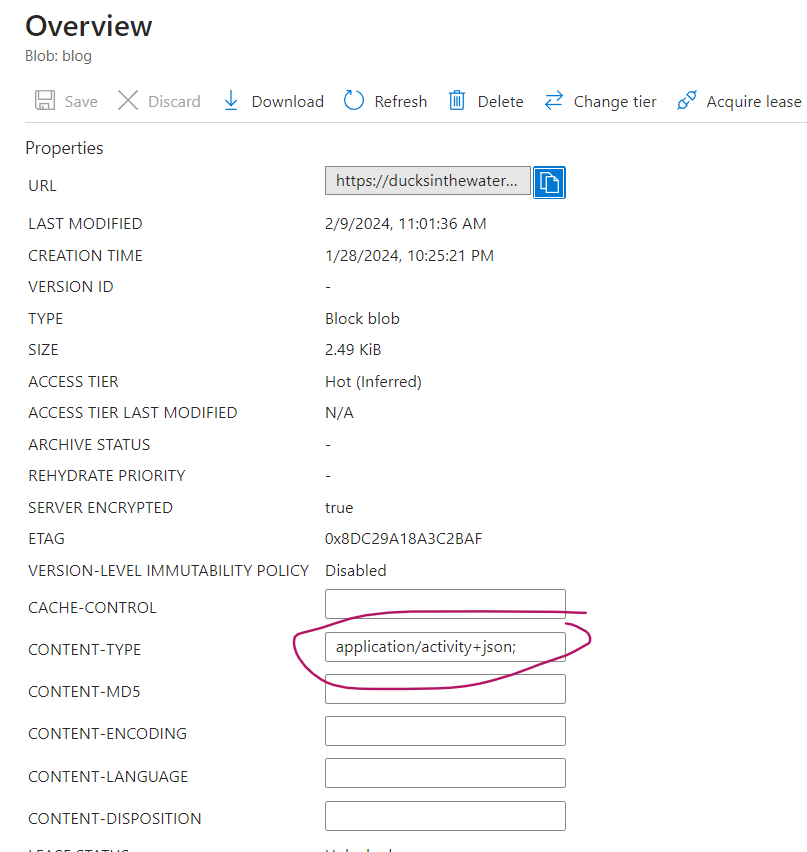
Again, this step is very simple but I decided to create a separate section to highlight its importance. As explained before, we must ensure the files are served with the correct Content-Type, so I use the az cli to do it. You can also do it in the portal, and it can be done in any other cloud provider like AWS:
az storage blob update -c "\$web" -n "blog" --content-type "application/activity+json;"
And that's it! Your blog should be discoverable.
In the next blog post, I will explain how to make your static site handle follows/unfollows in the inbox. If you're interested, follow @blog@maho.dev in the Fediverse and let me know what you think!